Benlee Property Trusts

Tenant Information

6 The Crescent, Kingsgrove

Find an available room

Checking… Meeting Room 1
Checking… Meeting Room 2
Checking… Meeting Room 3

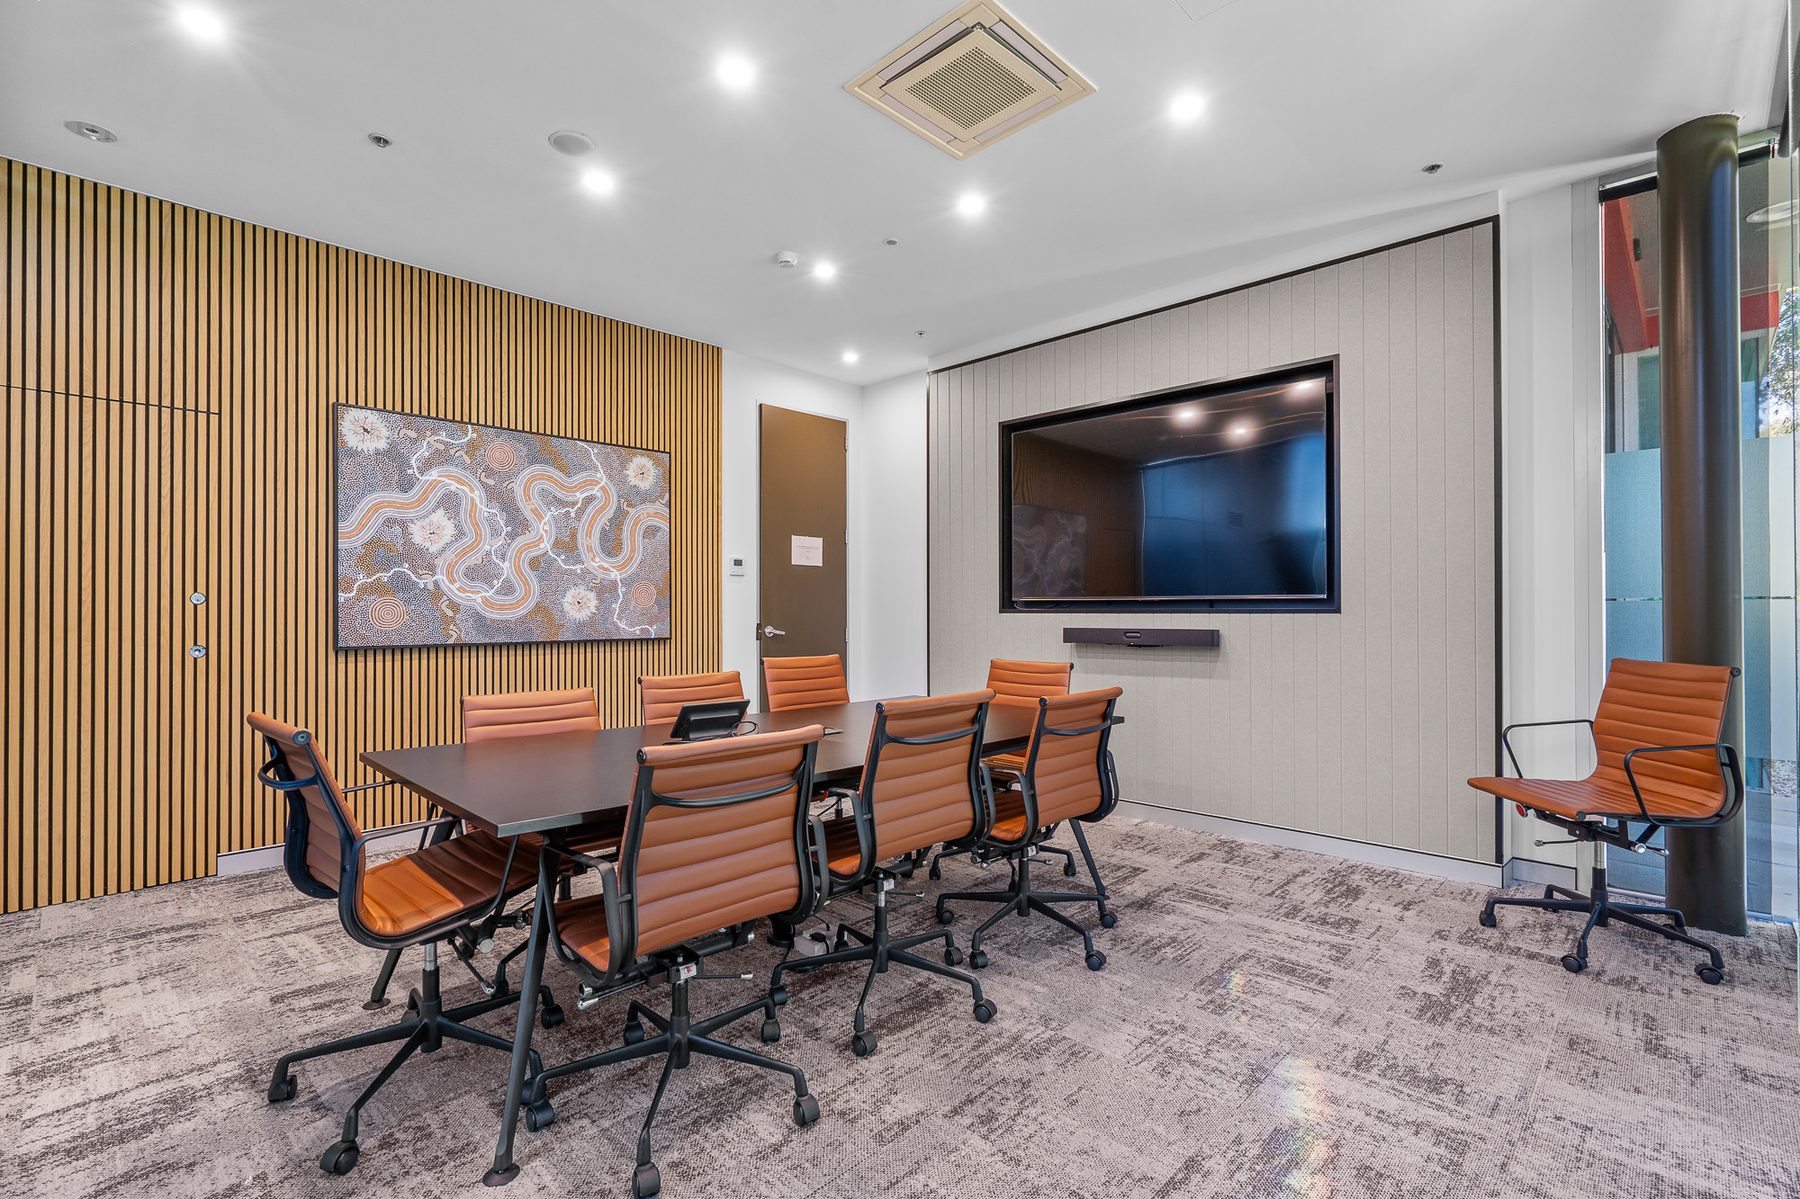
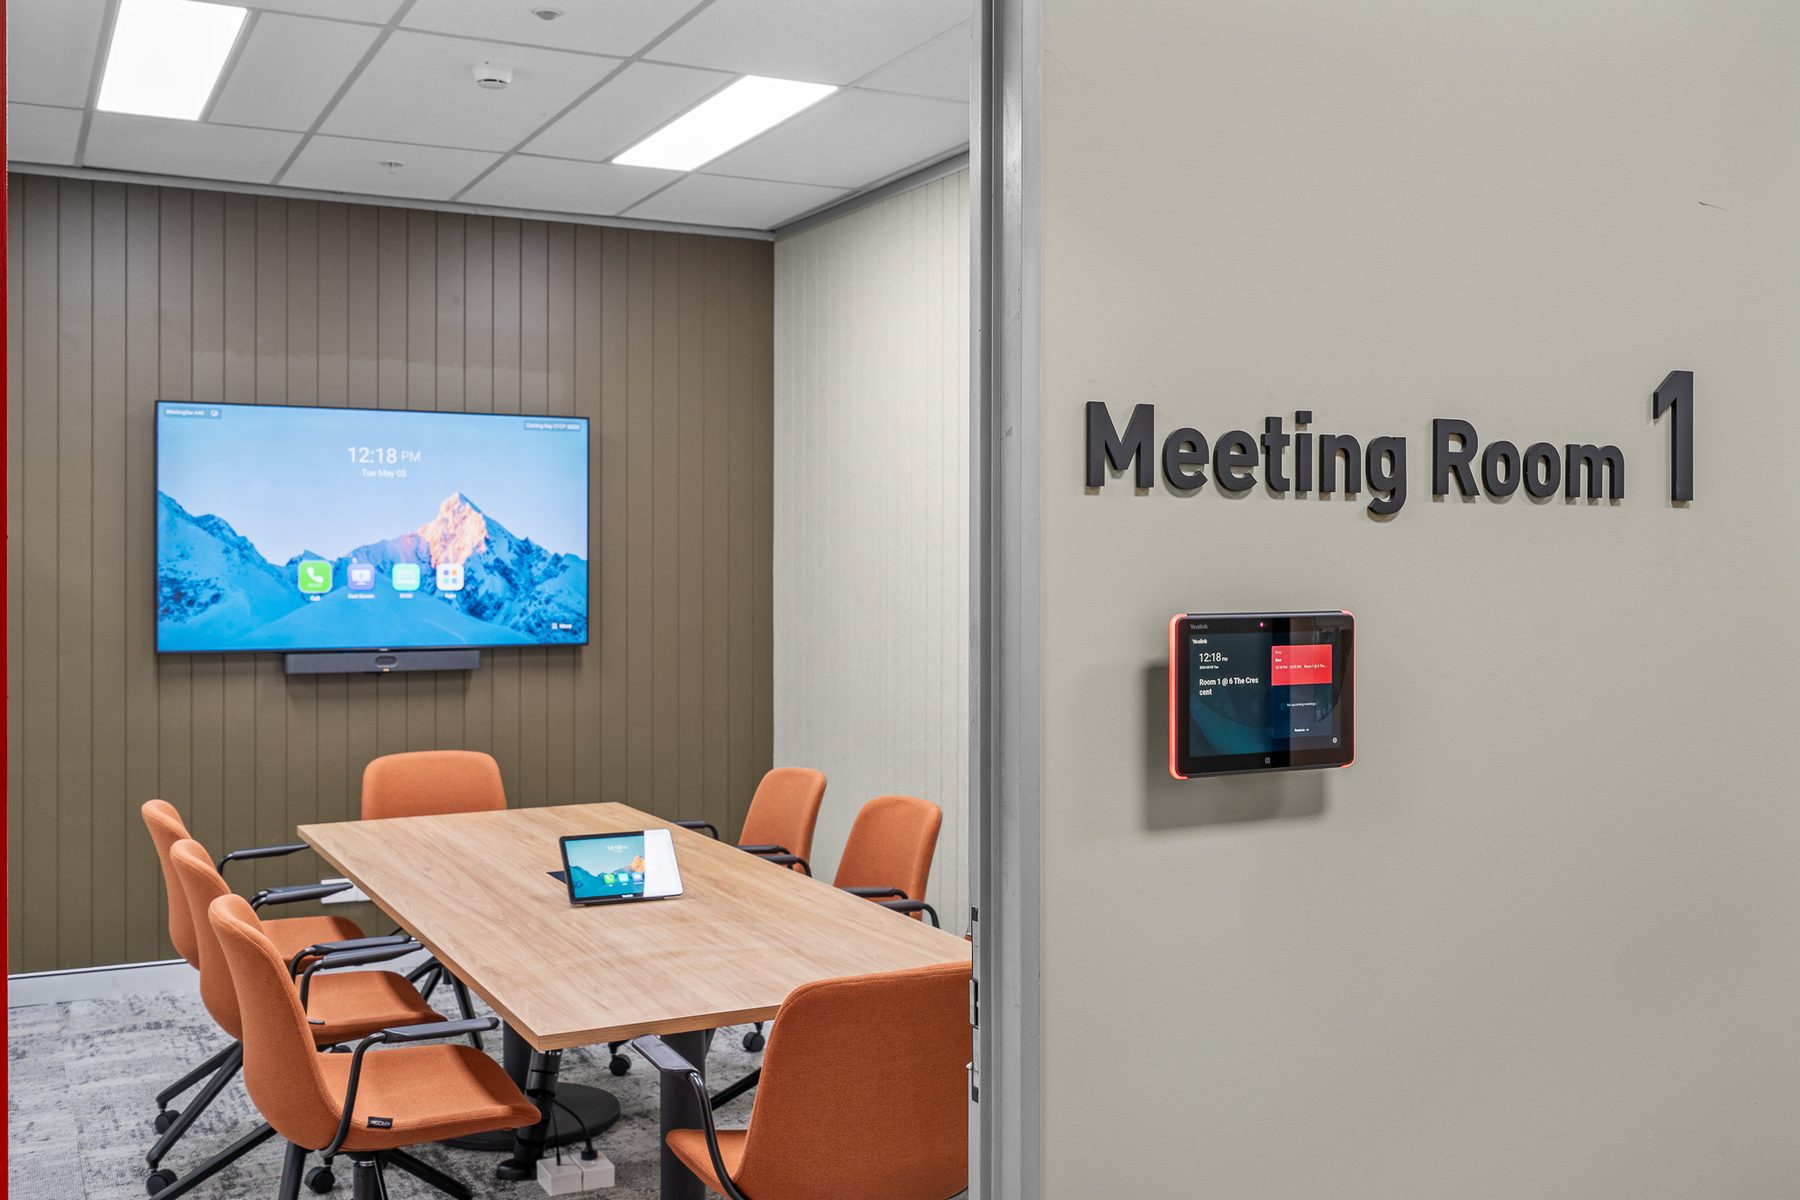
Meeting Room 1

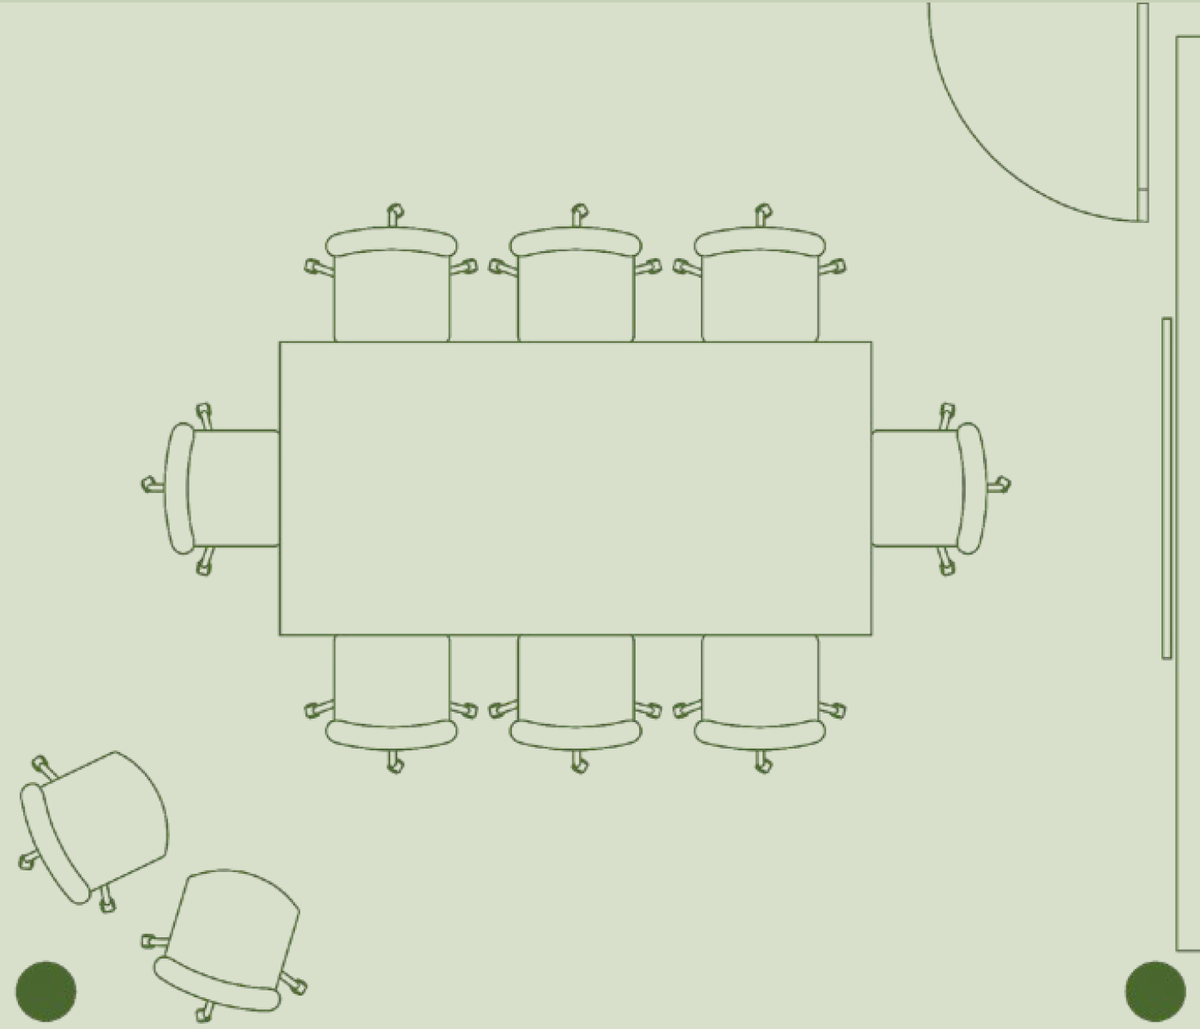
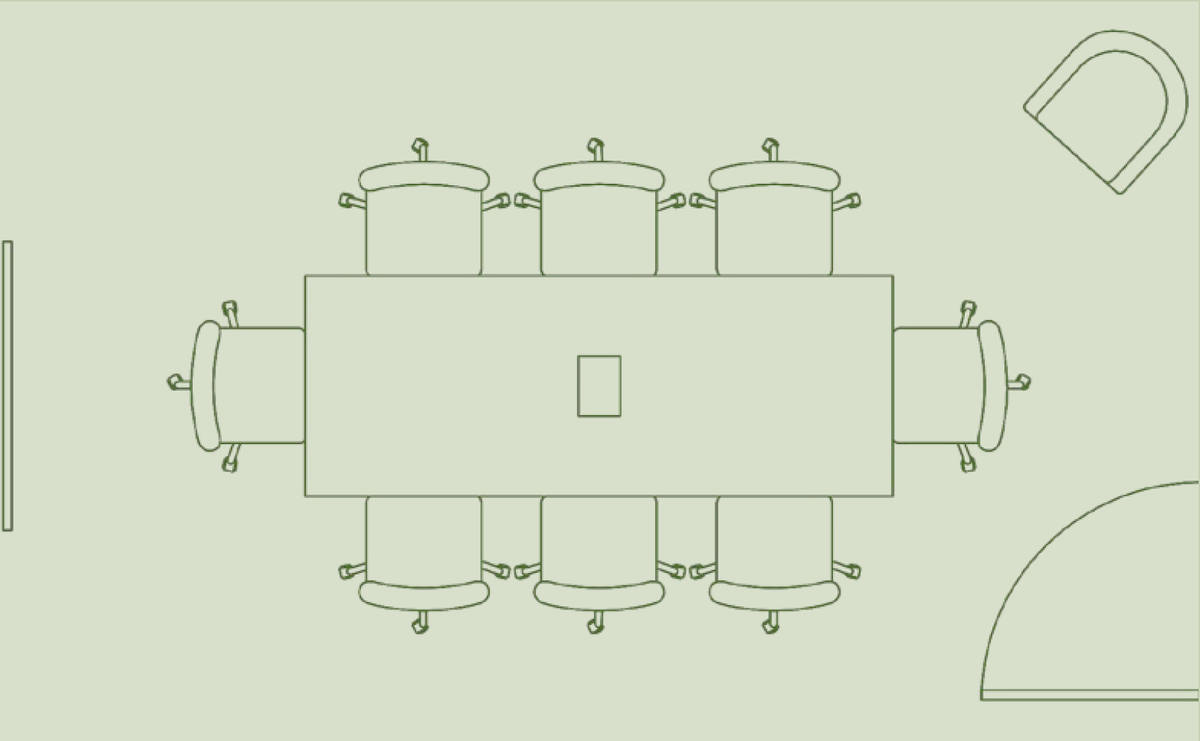
Level 1 Seats 8 (max 9)
Meeting Room 1
Meeting Room 1 floor plan

Amenities

  • Wall-mounted flat-screen TV
  • Yealink A50 conferencing bar
  • USB-C cable connection at table
  • In-table power outlets for charging
  • Air conditioning

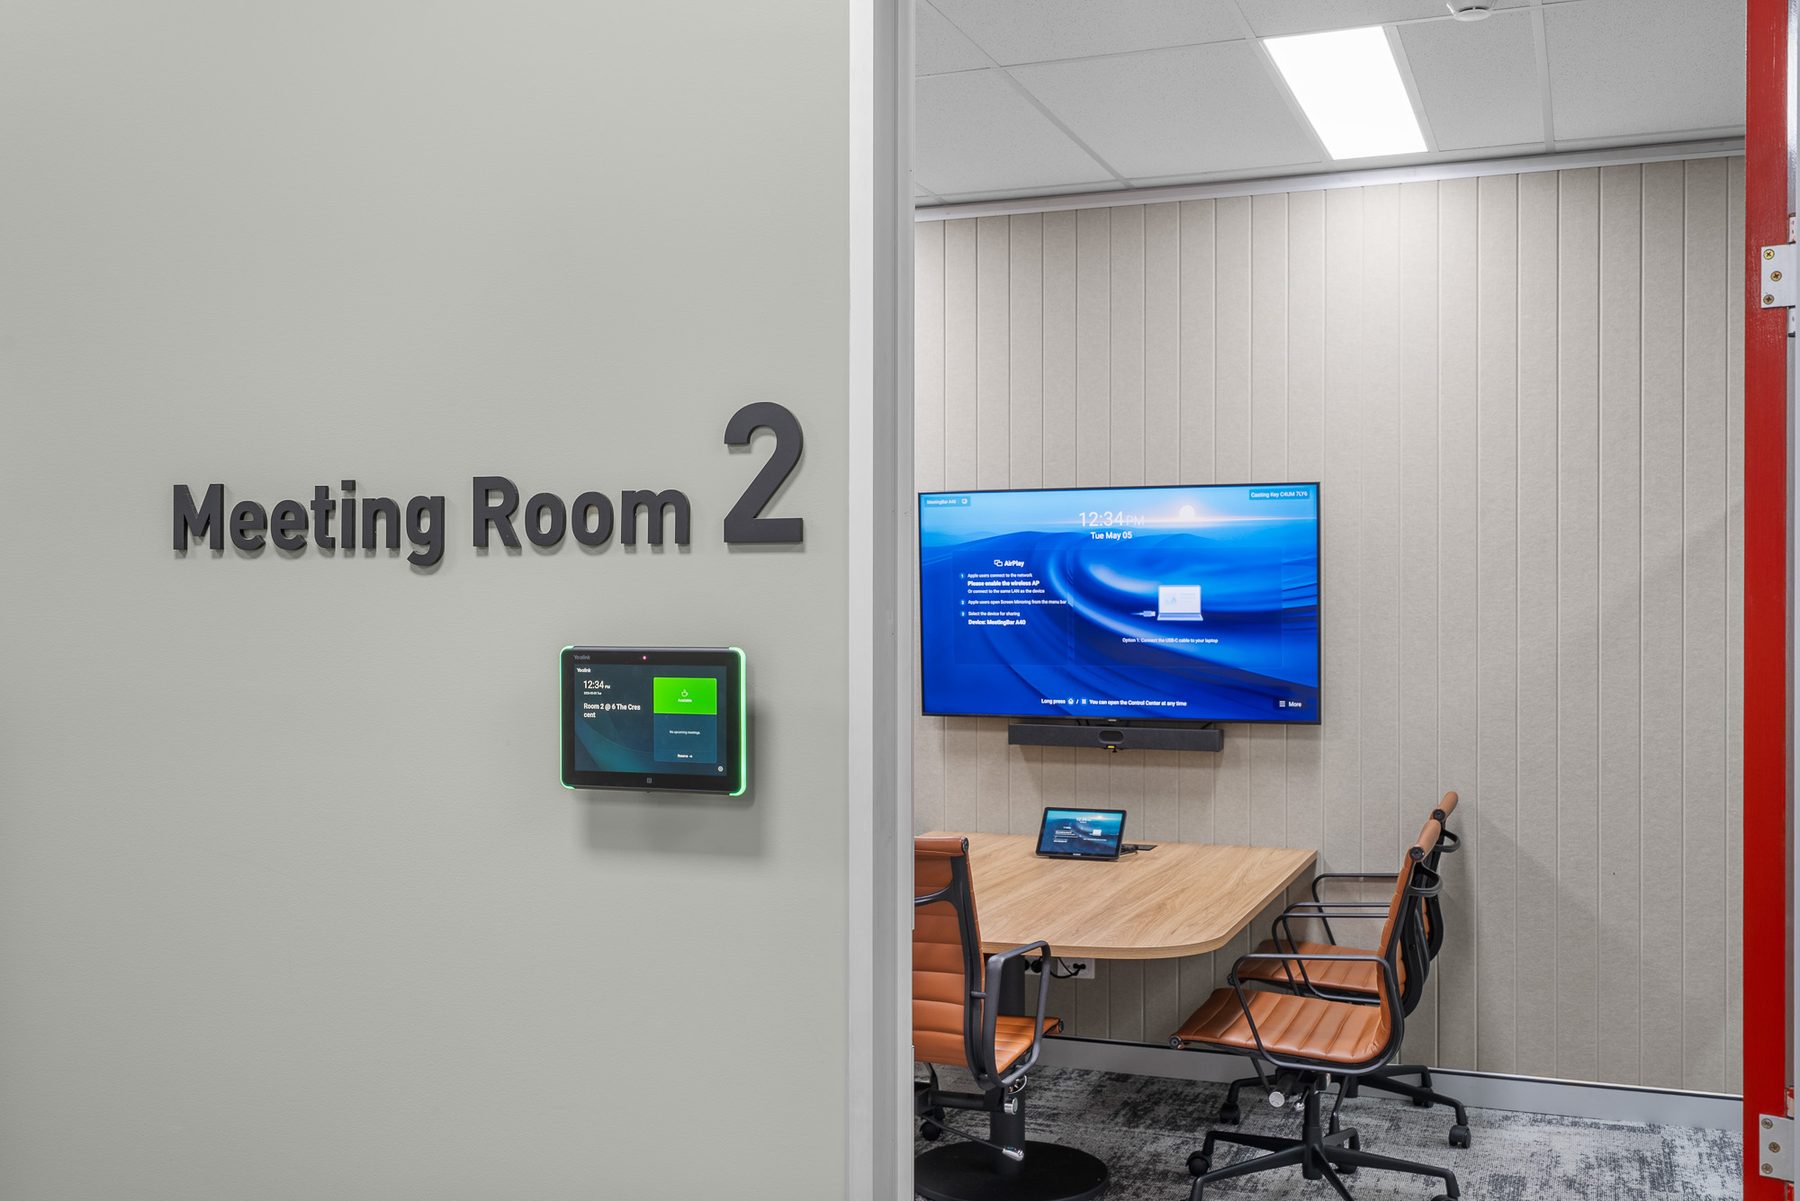
Meeting Room 2

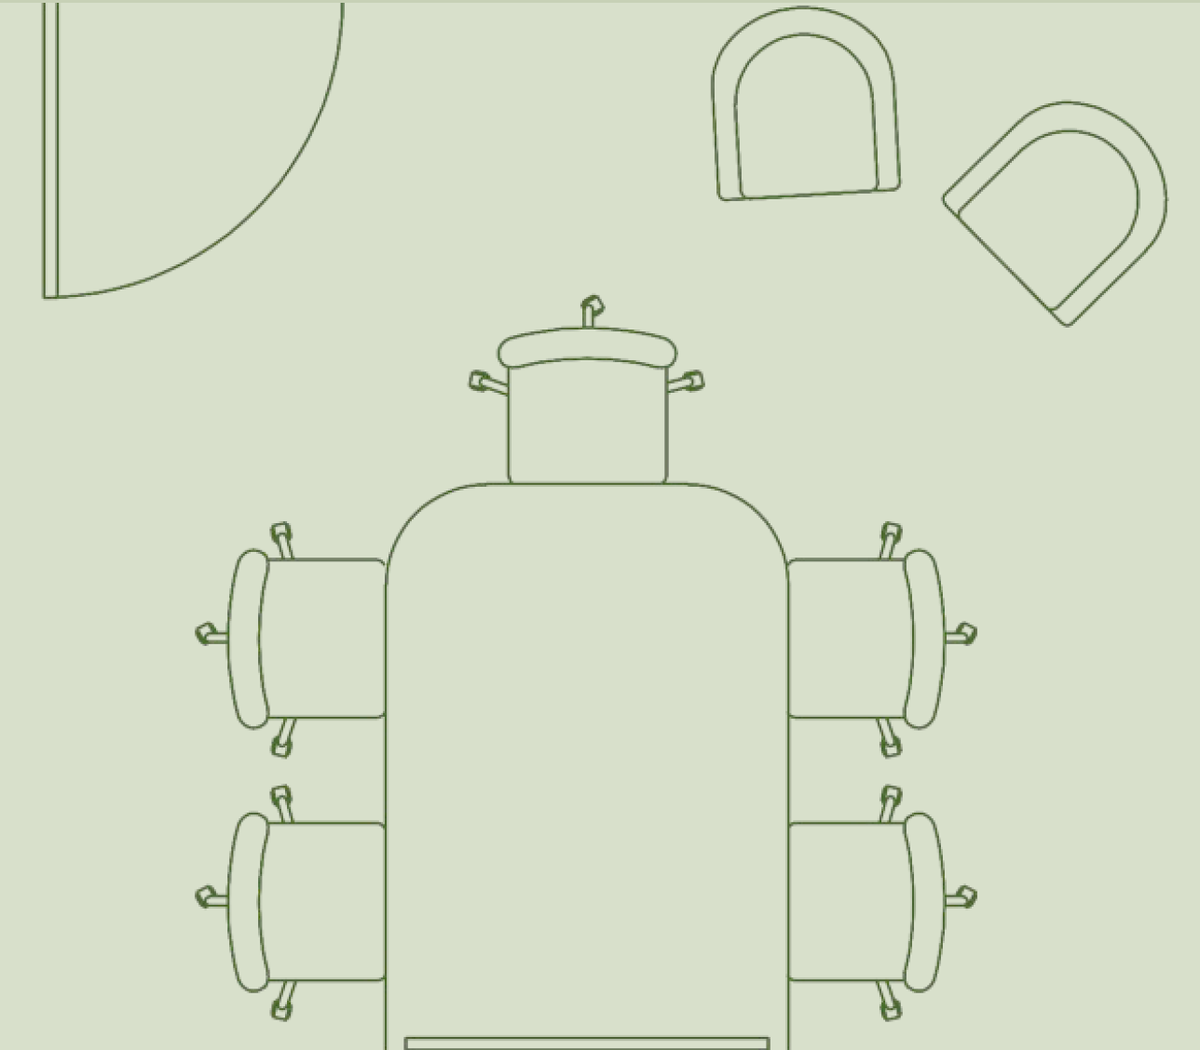
Level 1 Seats 5 (max 7)
Meeting Room 2
Meeting Room 2 floor plan

Amenities

  • Wall-mounted flat-screen TV
  • Yealink A50 conferencing bar
  • USB-C cable connection at table
  • In-table power outlets for charging
  • Air conditioning

Meeting Room 3

Ground Floor Seats 8 (max 10)
Meeting Room 3
Meeting Room 3 floor plan

Amenities

  • 85″ flat-screen TV
  • Yealink A50 conferencing bar
  • USB-C cable connection at table
  • In-table power outlets for charging
  • Air conditioning

The three meeting rooms are spread across two levels. Use the building plan below to find your way — Meeting Rooms 1 & 2 are on Level 1, and Meeting Room 3 is on the Ground Floor.
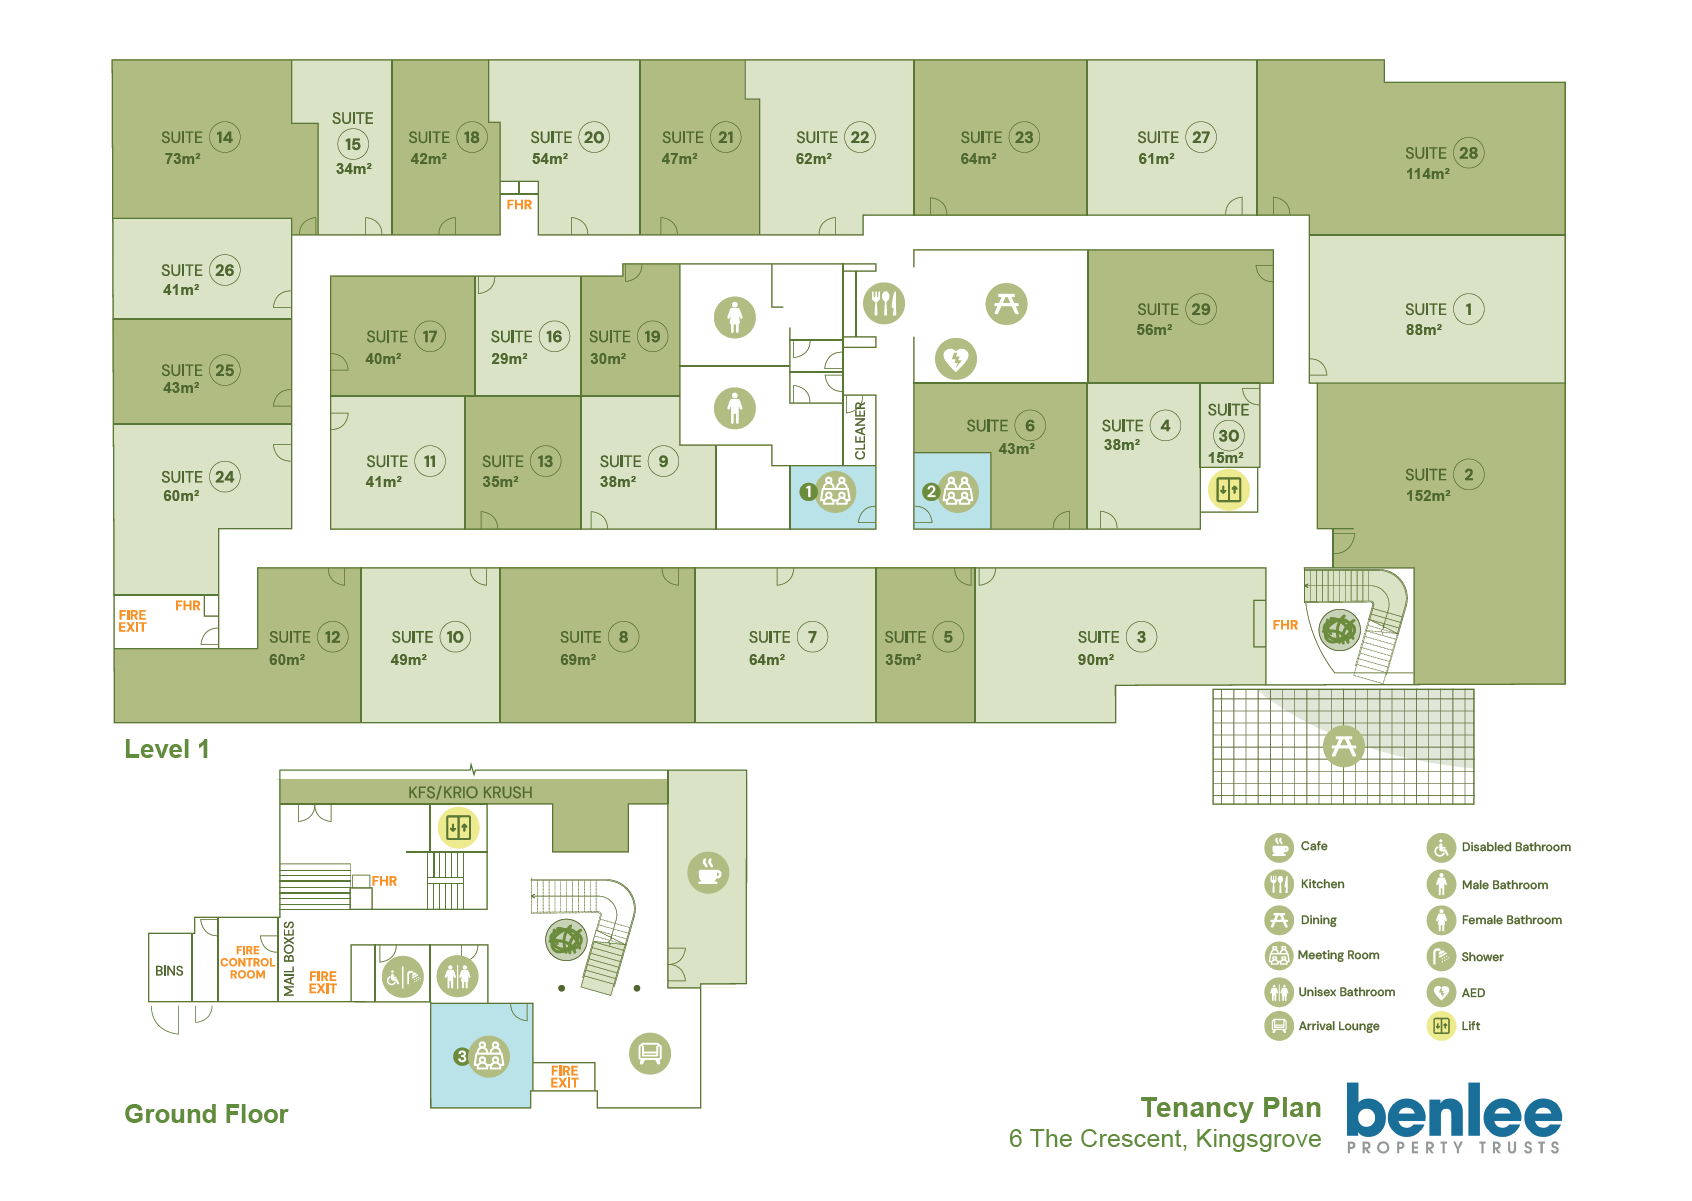
6 The Crescent, Kingsgrove — tenancy plan showing Level 1 and Ground Floor

Quick Reference

  • Meeting Room 1 Level 1
  • Meeting Room 2 Level 1
  • Meeting Room 3 Ground Floor

Booking Instructions

Booking a meeting room takes about a minute. There are two ways to do it — send the room a calendar invite from your computer or phone, or tap the tablet outside the room as you walk past. Both write to the same calendar, so however you book, the room's live availability stays in sync everywhere.

How to book a room

  1. Check availability. Open the Availability tab on this page and confirm the room you want is free for your time slot.
  2. Create a calendar event in Outlook (or your preferred calendar app) for the date and time you need.
  3. Invite the meeting room as an attendee using its email address:
  4. Send the invite and watch your inbox. If the room is free, you'll receive a confirmation email within a few seconds. If there's a clash, the room will decline the invite — try another time or another room.

If a room is already booked

Two options: try a different room (the Availability tab shows all three side by side, so you can spot the next free slot quickly), or try a different time. The tablet outside each room also displays the next 7 days of bookings, which can help you plan around busy periods.

Booking from the tablet outside the room

Each meeting room has a Yealink tablet mounted next to its door. The tablet shows whether the room is currently available (green) or in use (red), and displays bookings for the next 7 days at a glance. You can make bookings directly from the tablet — both ad-hoc ("walk past, see it's free, jump in") and for any future slot within that 7-day window.

The exact on-screen wording may vary slightly, but the flow is:

For an ad-hoc booking (the room is free right now):

  1. Tap Reserve (or Book Now) on the home screen.
  2. Choose how long you need the room — typical options are 15, 30, 45, or 60 minutes.
  3. Optionally enter a meeting title.
  4. Confirm.

For a future booking (any time in the next 7 days):

  1. Tap the calendar or schedule icon to open the agenda view.
  2. Navigate to the date and time you want.
  3. Tap an empty time slot.
  4. Choose duration, add a title, and confirm.

While a meeting is in progress:

  • End early — tap End on the screen to release the room for others.
  • Extend — if the next slot is free, tap Extend near the end of your booking to add more time.

House Rules

  • Vacate by your booked end time. Other tenants may be waiting — please wrap up promptly so the next booking can start cleanly.
  • Keep bookings to a maximum of 2 hours. We'd appreciate it if individual bookings are kept within 2 hours so the rooms stay accessible to everyone across the day.
  • Cancel bookings you don't need. If your plans change, release the room in Outlook so others can grab the slot.
  • Leave the room as you found it. Push chairs back into position, take any rubbish with you, and return cups or glasses to the kitchen.
  • Don't unplug or rearrange the conferencing cables. Only the USB-C cable on the table should ever be plugged in or unplugged — leave the rest of the Yealink kit alone.
  • Keep food and drink simple. Coffee, water and snacks are fine. Please avoid hot food, anything messy, or anything fragrant that lingers.
  • Report any issues to building management. Broken kit, room too hot or cold, or anything else not quite right — let building management know so it can be fixed before the next booking.
Questions? Contact building management at admin@benlee.co.

Conferencing

All three meeting rooms are fitted with a Yealink A50 conferencing system and a Yealink Touch Panel. The setup is platform-agnostic — it works with Microsoft Teams, Zoom, Webex, Google Meet, Skype, and any other meeting app you prefer. You bring your own laptop, plug in via USB-C, and the Yealink hardware becomes your camera, microphone, and speaker for the call. No logins, no system-specific software.
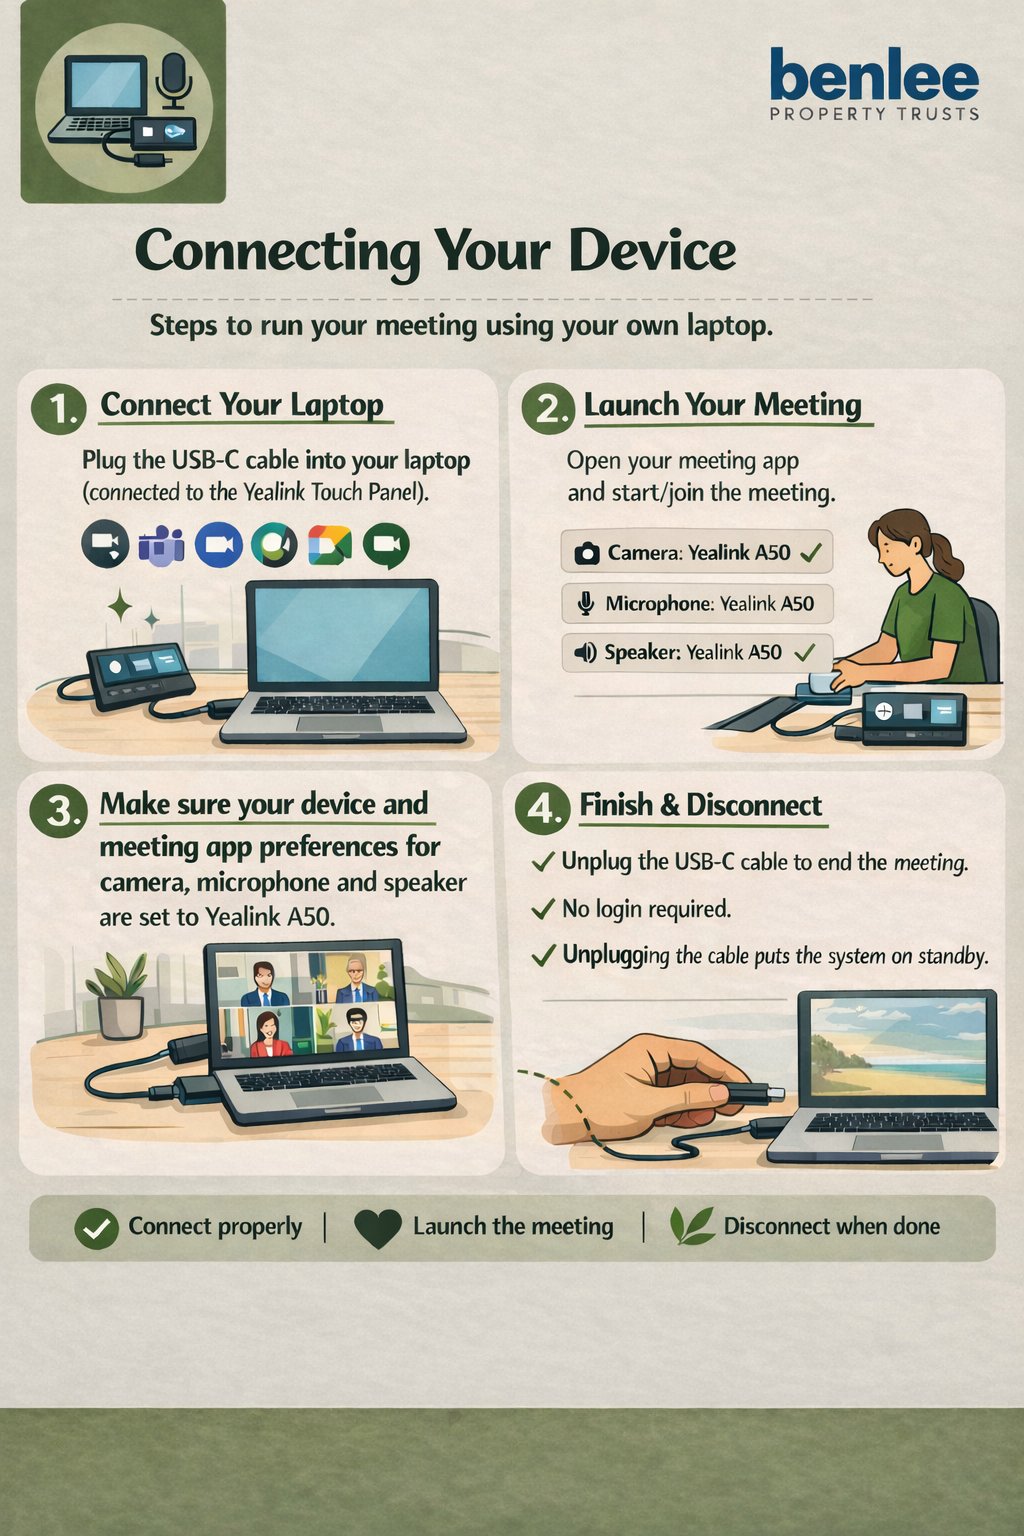
How to run a meeting

  1. Connect your laptop. Plug the USB-C cable on the table into your laptop. The cable is already connected to the Yealink Touch Panel.
  2. Launch your meeting. Open your meeting app (Teams, Zoom, etc.) and start or join the meeting as you normally would.
  3. Check your settings. In your meeting app, make sure the camera, microphone, and speaker are all set to Yealink A50.
  4. Finish & disconnect. When the meeting ends, simply unplug the USB-C cable. Unplugging puts the system on standby — no logout required.
Connecting Your Device — Yealink A50 quick reference poster
Quick reference poster (also displayed in each room)

Getting the most out of the Yealink A50

The MeetingBar A50 is the long horizontal bar mounted below the TV in each room. It's an all-in-one device — the camera, microphone, and speakers are all built in — so once your laptop is plugged in via USB-C, no other equipment is needed.

A few things worth knowing:

  • Whole-room microphone pickup. No need to lean toward the bar or pass a mic around. Sit normally at the table and speak at a normal volume.
  • Noise cancellation and echo control are built in. The system separates your room's audio from the remote audio automatically, so there's no feedback loop.
  • The camera supports several different modes — see the section below for how to switch between them.

Camera modes

The A50 camera can be set to different modes depending on what suits your meeting. From the touch panel on the table, tap the Camera or Layout icon to see the available modes, then tap a mode to switch.

Group Frame

Auto-frames everyone

The camera detects all people in the room and adjusts to fit them together in shot. Best when several people will speak during the meeting.

Speaker Tracking

Follows the active speaker

The camera zooms in on whoever is currently talking. Best for presentations or formal discussions where one person speaks at a time.

Picture-in-Picture

Group + active speaker

Shows the whole-room view as the main image, with a small inset of the active speaker in the corner. Best when remote participants want to see both at once.

Manual

You control the camera

You pan, tilt, and zoom the camera yourself using the touch panel. Best when you want to focus on something specific — a whiteboard or a particular person.

Using the touch panel during a meeting

Beyond switching camera modes, the touch panel on the table also lets you:

  • Adjust volume — speaker, microphone, or ringer.
  • Mute the microphone — useful when you need to talk in the room without being heard on the call.
  • Pan, tilt, and zoom the camera manually — when you're in Manual mode and want fine control over what's in frame.

Privacy

If you want to be sure the camera and mic are off:

  • Use the Camera Off or Privacy toggle on the touch panel.
  • The camera also has a physical privacy shutter — slide it across to cover the lens.
  • Unplugging the USB-C cable at the end of a meeting puts the system on standby — the camera and mic stop transmitting.

Common problems

  • Meeting Room 3 — TV showing the wrong input. Occasionally the TV in Meeting Room 3 toggles between input sources and stops showing your laptop. To fix it: open the power box in the centre of the boardroom table — you'll find a TV remote inside. Use the remote to switch the TV to the correct HDMI input. Once you've selected the right HDMI and your laptop is plugged in via USB-C, your screen should appear on the big screen.
Tech not working? Contact building management at admin@benlee.co.

Storerooms

Short-term storeroom leases are available to tenants of 6 The Crescent on a flexible basis — ideal for overflow storage, archives, or seasonal items.

Details about currently available storerooms — sizes, rates, and locations — are coming soon.
Interested in a storeroom? Contact building management at admin@benlee.co for current availability.

Parking

Additional parking spaces are sometimes available on a short-term lease for tenants needing extra capacity for staff, visitors, or vehicles on site.

Details about currently available parking — number of spaces, rates, and location on site — are coming soon.
Need extra parking? Contact building management at admin@benlee.co to check current availability.

Vacant Offices

From time to time, office suites within 6 The Crescent become available for lease. Listings below show what's currently on the market.

Details about currently vacant offices — suite numbers, sizes, rates, and photos — are coming soon.
Looking to lease an office? Contact building management at admin@benlee.co for current availability and a tour.

Management

The team responsible for managing the property at 6 The Crescent, Kingsgrove.

Photo coming soon

Gary Paul

Property Manager

[Short bio for Gary — coming soon]

[Contact details — coming soon]

Photo coming soon

Ben Dalley

Trust Manager

[Short bio for Ben — coming soon]

[Contact details — coming soon]